The Living Room Rebuild (Part 3)
PROJECT #16a - FIREPLACE SUPPORT & REBUILD
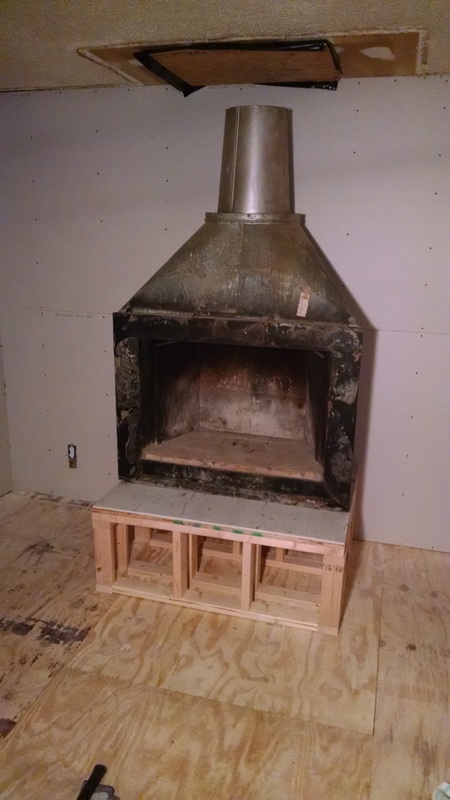
BEFORE
|
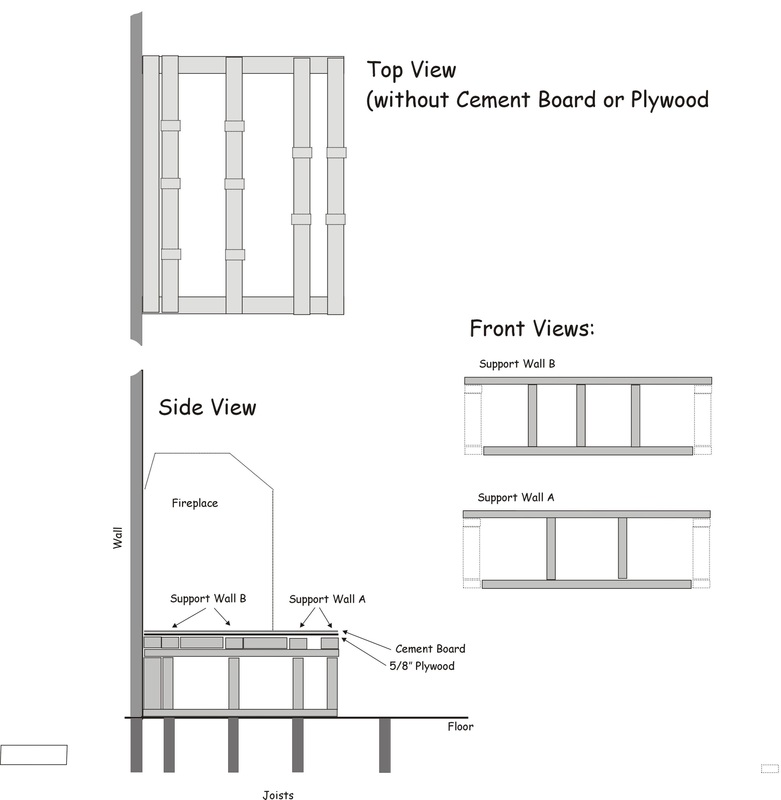
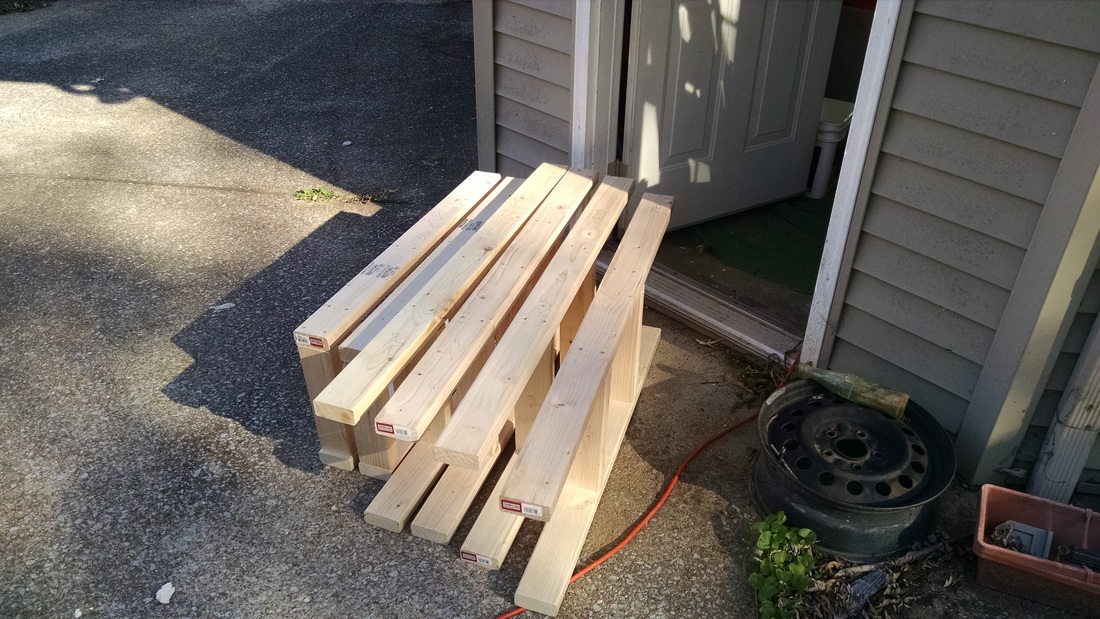
Since the original fireplace used cinderblocks, I would need to build something more standard out of wood. No plans exist for such an item so I again was lost. After much work and discussion, the plans to the right were deemed "Overkill" for this project which seemed to me to be about right.
|
|
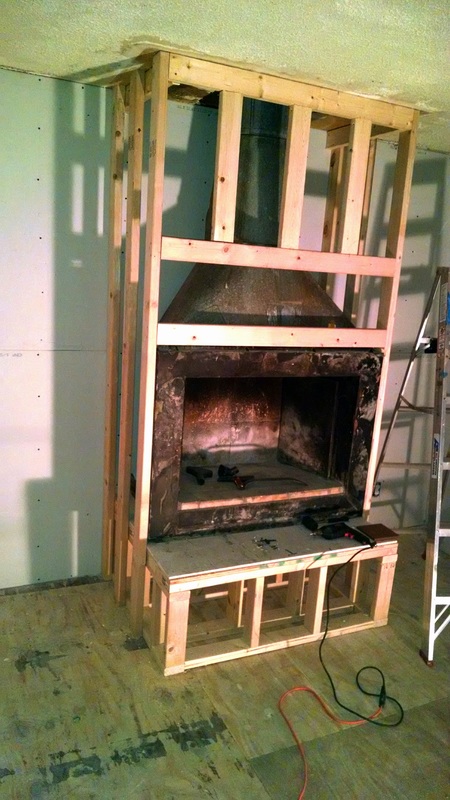
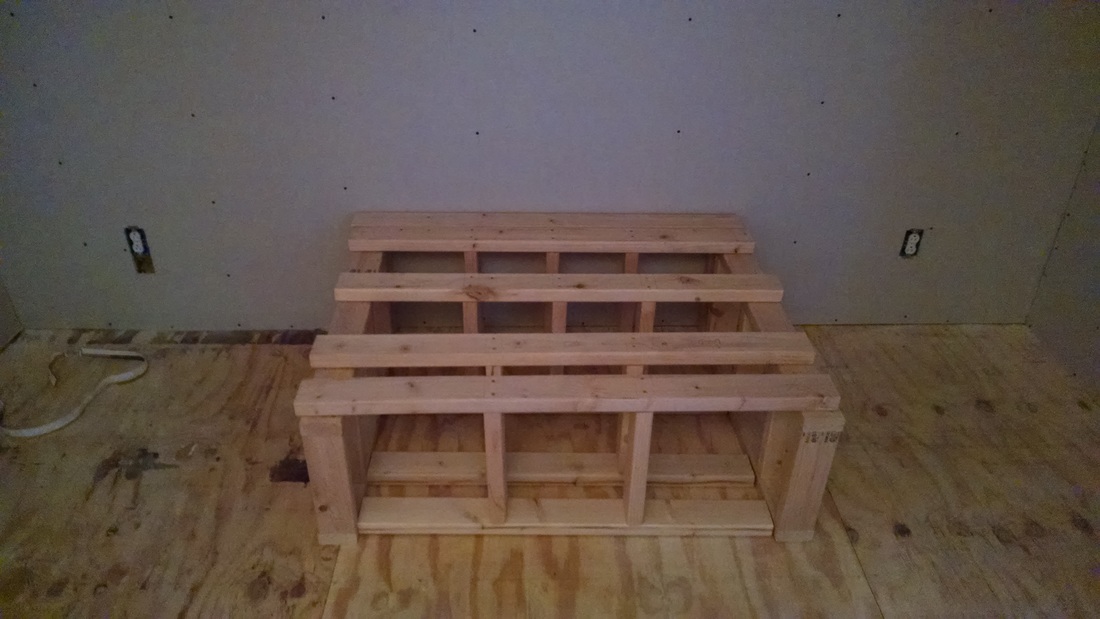
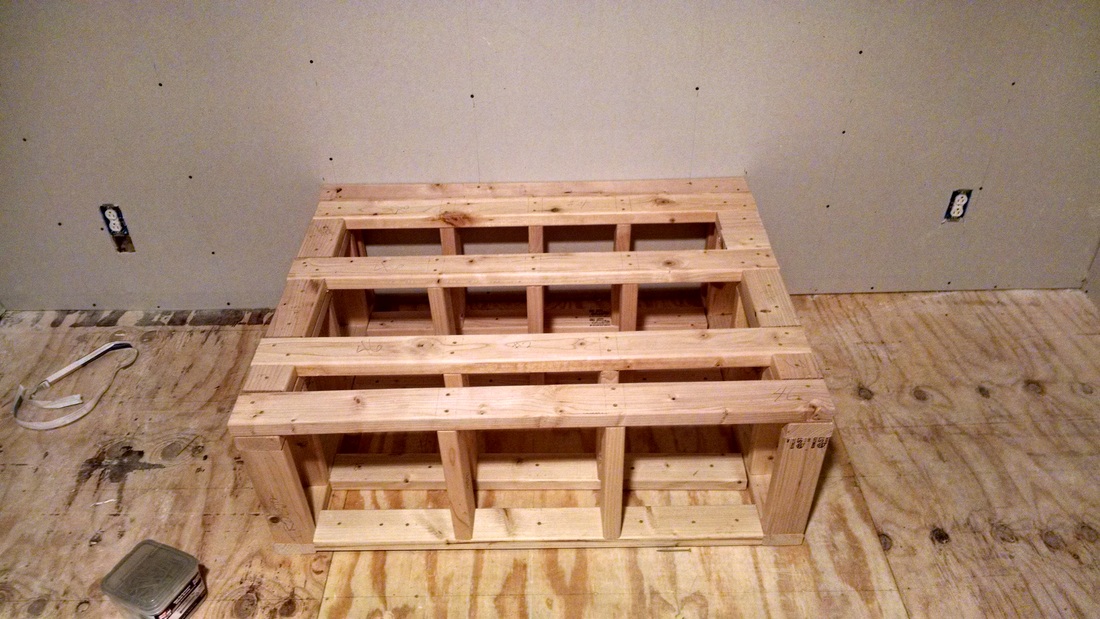
During
|
The supports are built outside, and then assembled in place in the living room.
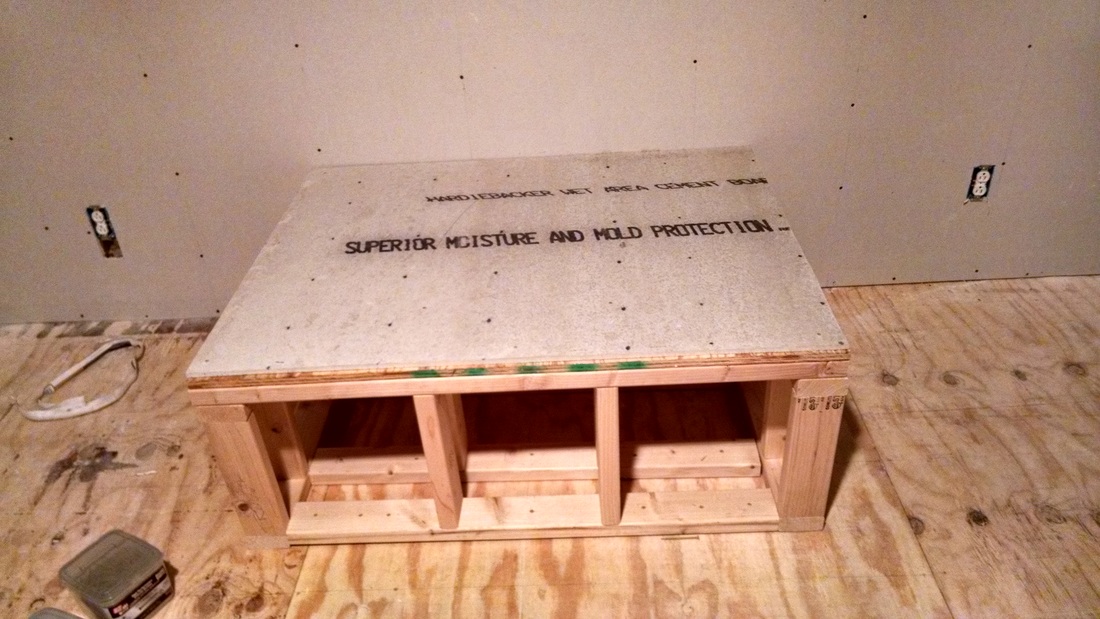
Once screwed down to the floor, the spaces are filled in and then the entire thing is given a cement board top. |
|
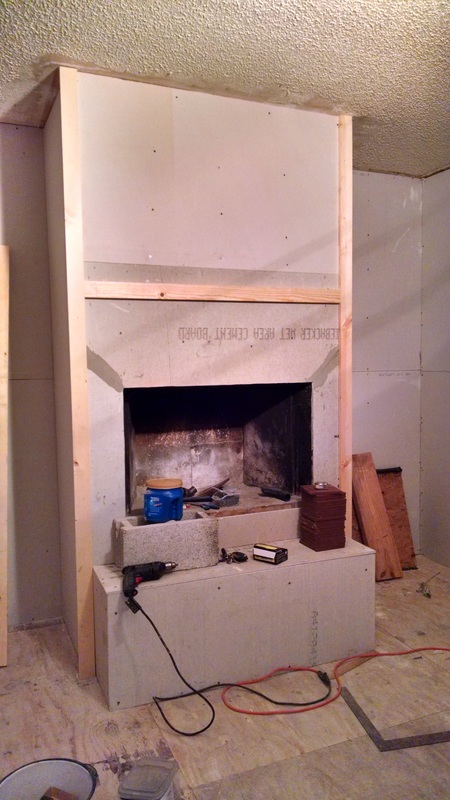
After
|
With help, the drop in fireplace insert is re-positioned on the new support. It's now ready for the chimney to be installed. (Chimney install can be seen by Clicking Here and Creation of the Chimney cap can be seen by Clicking Here
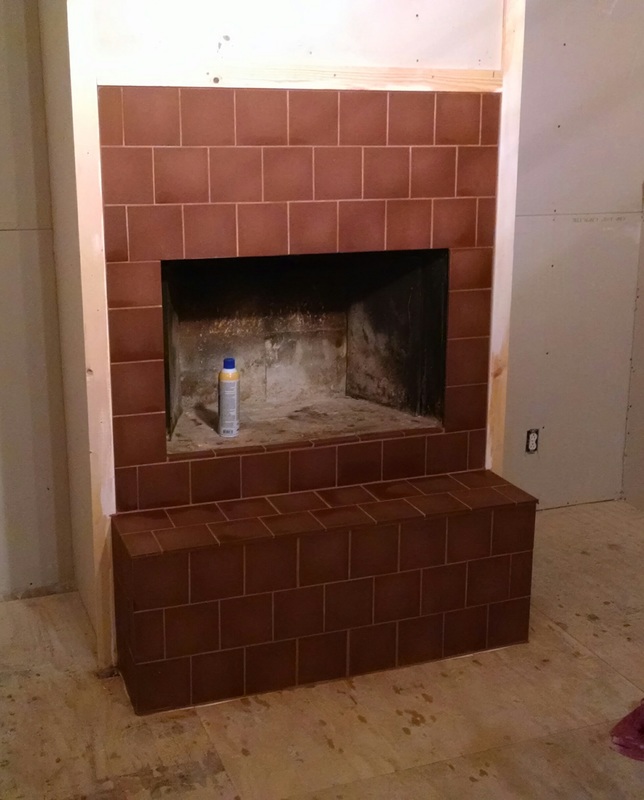
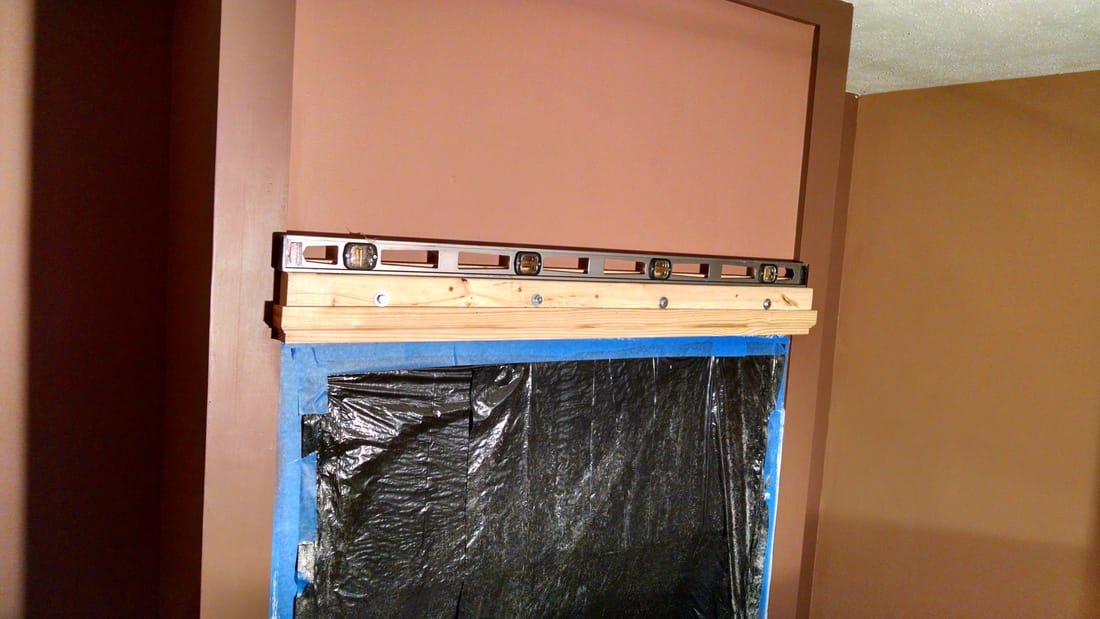
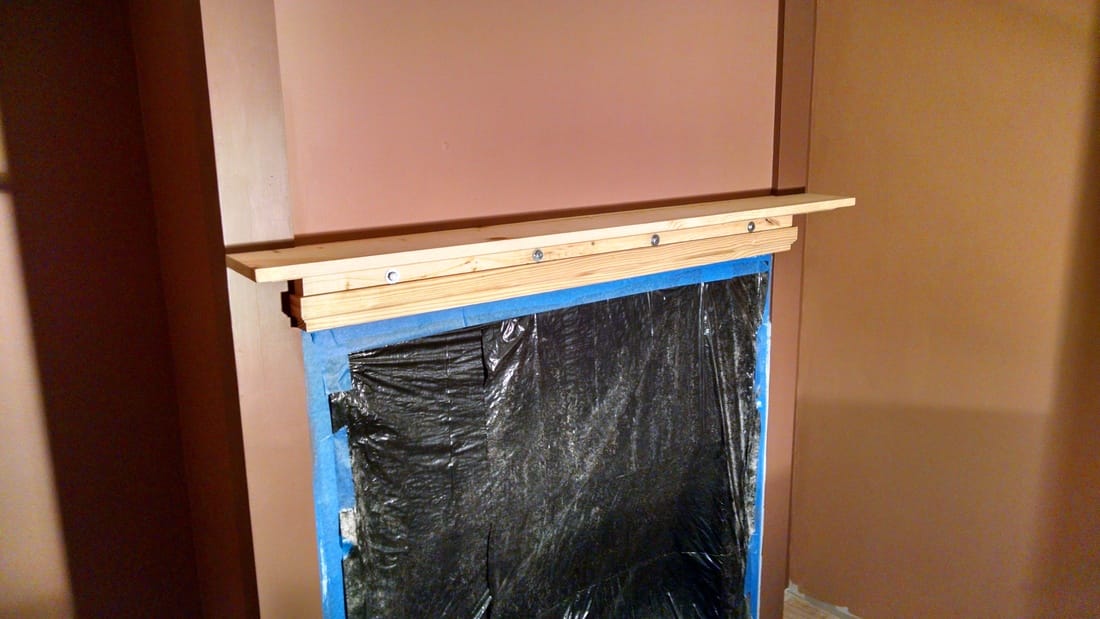
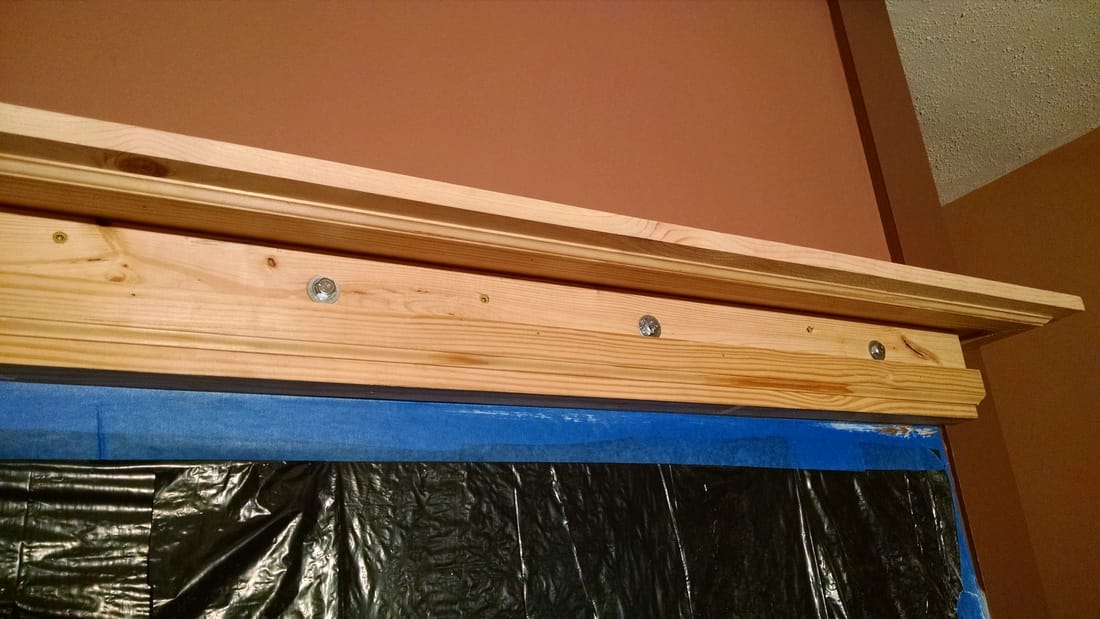
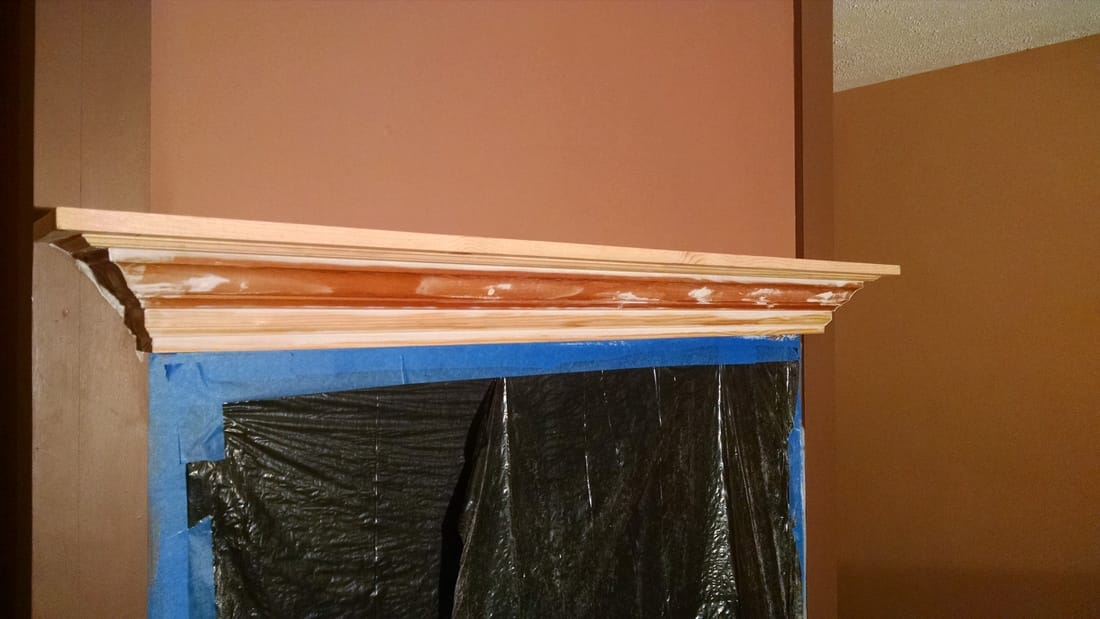
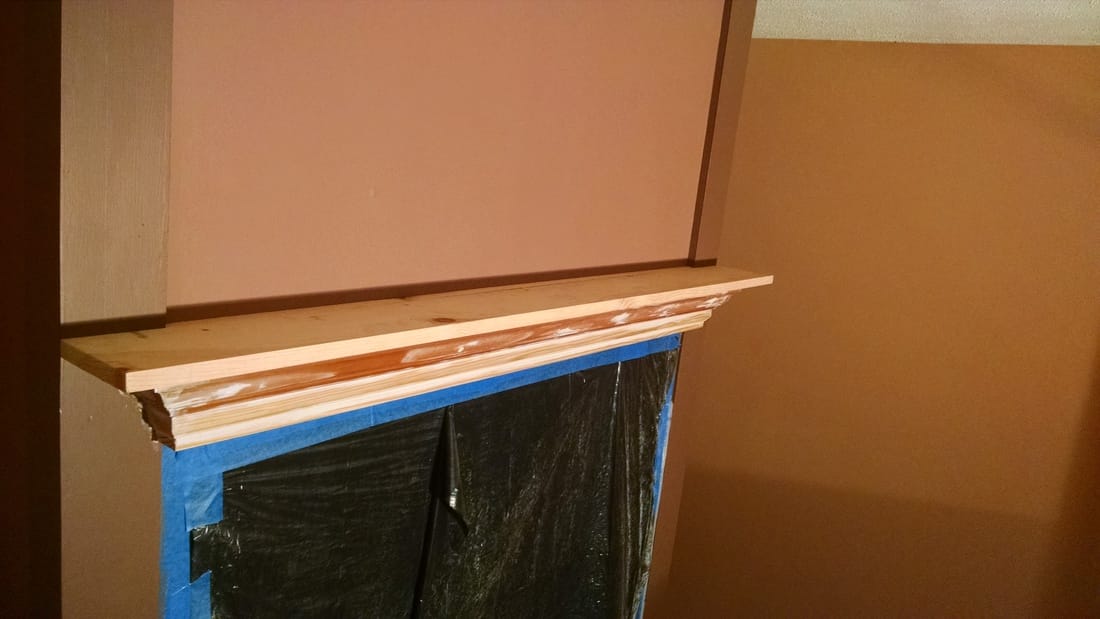
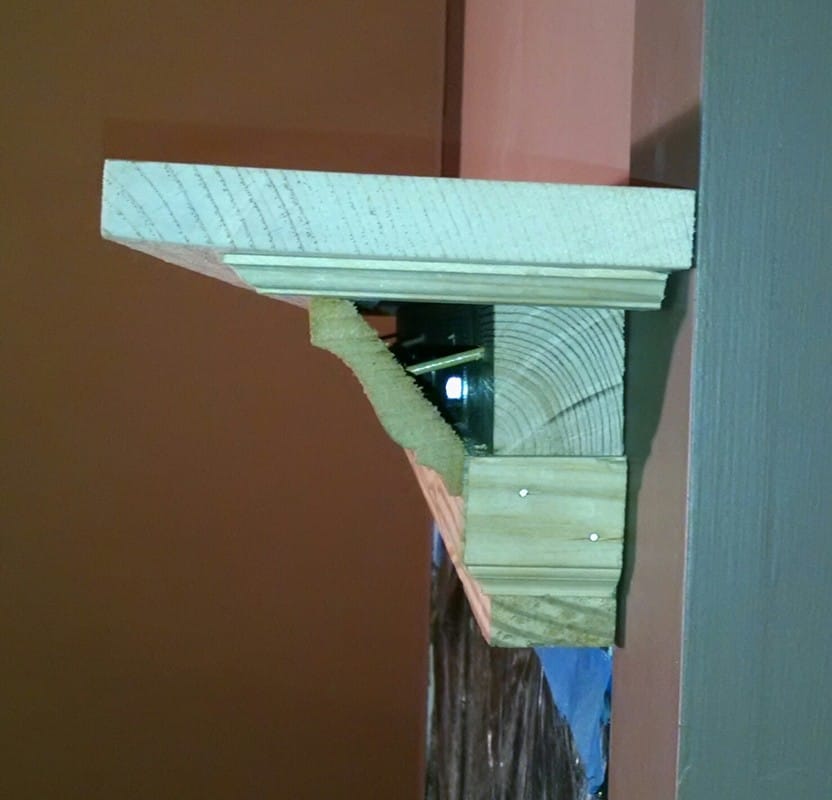
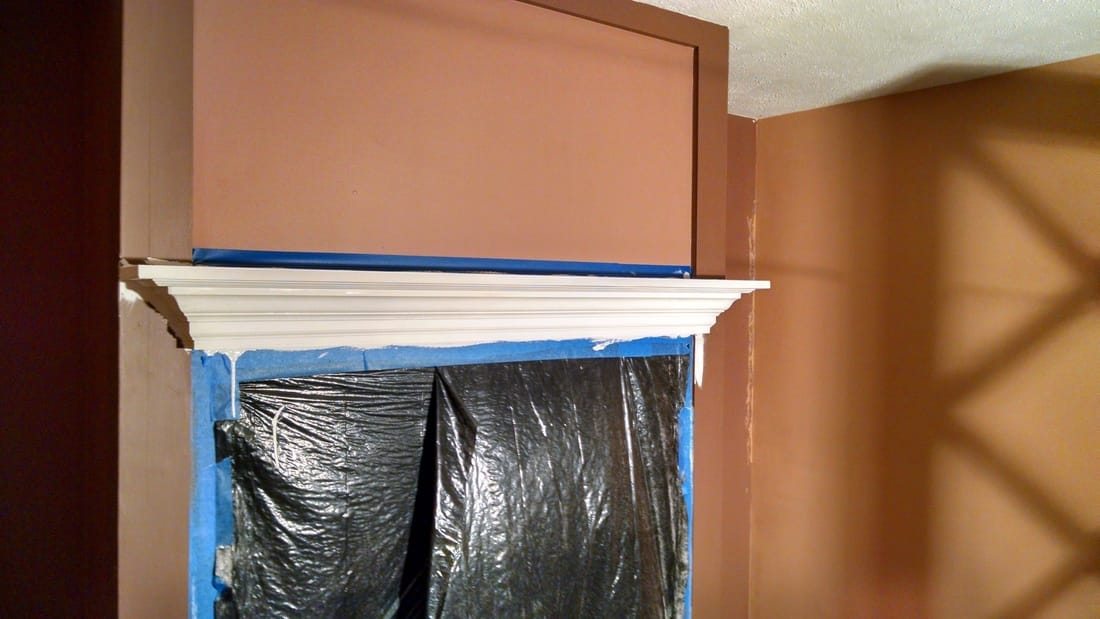
Once the chimney is installed, the fireplace is framed and covered in drywall. The front of the fireplace is covered in hardee board in preparation for the tile. Tile is added to the front ofthe hearth. The old fireplace doors are repainted to match the new paint scheme. We created a mantle utilizing crown molding saved from the demolition. First a 2x4 is placed on the wall and leveled. Pieces of 'stops' are used to create the skirt on the 2x4. A 1x6 is attached to the top of the 2x4 (which has the same 'stops' attached to the bottom.) Crown molding is cut to cover the center area between the two sets of 'stops' Two views of the mantle before primer. Here you can see a cutaway from the side of the crown molding and the stops. The mantle is painted to match the color of the uprights. Return to the living room rebuild to see the completed mantle. More complete steps to the creation of this mantle can be found on Instructables.com |
|